DEMONSTRATING THE USE OF RULE OF THIRDS.
Define rule of thirds: The rule of thirds is a guideline which applies to the process of composing visual images such as paintings,photographs and designs.The guideline proposes that an image should be imagined as divided into nine equal parts by two equally-spaced horizontal lines and two equally-spaced vertical lines, and that important compositional elements should be placed along these lines or their intersections.
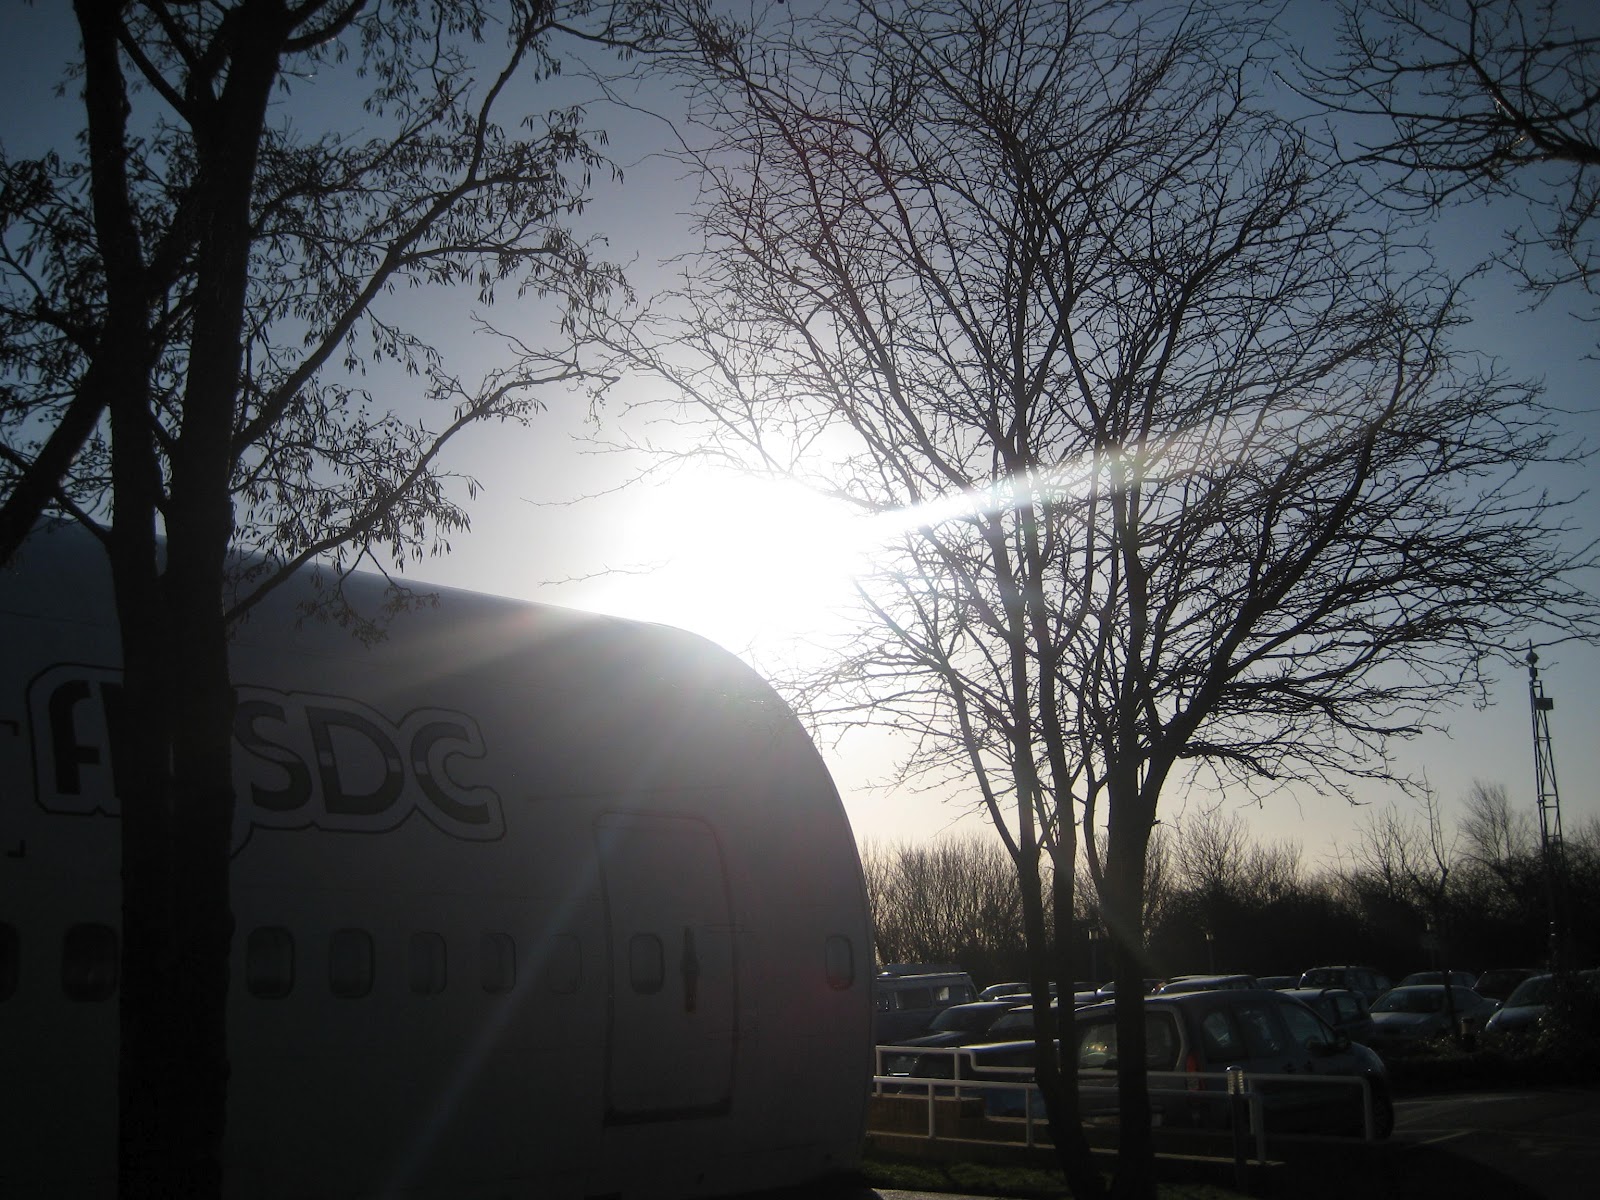
This image justifies the use of the rule of thirds. the prominent object in this photograph is the sun, which would be situated on one of the rule of third lines. If you imagine 9 lines you can easily tell the sun and part of the tree possibly along with the airplane would be the dominate objects making up this image. I personally like this image because not only does it justify what i'm explaining with the rule of thirds, but the photograph itself really defines everything in detail.

This is another image showing the use of rule of thirds, as you can see the door and the wall to the right are the dominant objects in this photograph which imagining a grid would fit perfectly within the lines. This image is a great example of the rule of thirds as a lot of lines are used in this photograph making it easier to visualise the rule of thirds being used.
DEMONSTRATING MACRO SHOTS.
Define macro: "Macro" lenses specifically designed for close-up work, with a long barrel for close focusing, are one of the most common tools for macrophotography.

This image was before i edited it, this is a macro image.

This is the image now edited through photoshop.
These two images demonstrate the use of Macro. I have captivated the main subject of this photo as one of the decorations on the tree. You can clearly tell the definition is crystal clear on the decoration with a blurred out background, making the decoration even more dominant, making this the centre point of this photograph. As you can see the second photo has been edited on photoshop to add a saturation effect, which makes the photo more visually appealing and interesting to look at. Although this photograph looks visually appealing i feel this style of image has been used a lot by other people, so thats why i took another photo (below) to show a slightly different image using macro.

This image is before it was edited.

This image was after it had been edited with sepia.
This is another macro image i have taken. Compared to the original image you can clearly see that the added effect on the second image is the use of sepia. Just by adding this simple effect it has increasingly brought out the vibrant colours used, making the image overall much more visualising. I have also zoomed in on the second image, to focus more on the centred image, making it look more defined and clear. I prefer this macro example to my first image of the decoration because i feel this image has more interesting features giving the overall effect a much more visualising outcome.
DEMONSTRATING PORTRAIT PHOTOGRAPHY AND LIGHTING SHOTS.
Portrait photography is the capture by means of photography of the likeness of a person or a small group of people (a group portrait), in which the face and expression is predominant.
Portrait photography is the capture by means of photography of the likeness of a person or a small group of people (a group portrait), in which the face and expression is predominant.

This image was taken professionally.

This is also another image taken professionally, showing an example of portrait photography.
Both images were taken professionally in a portrait manner, and you can obviously tell the lighting is extremely bright, other than that, the image is extremely clear focusing on the people within the image making this a perfect example of portrait photography. The only thing i would change about this image is that unfortunately when taking the photographs the background wasn't completely white, which is something i will work on in the future to adjust camera settings.

This image i have simply used photoshop to adapt a new lighting to the image, making it more darker, so the subject (in this case the people) stand out more against the shadowed background. I only used the filter button to select the 'render' button so i could change the lighting effects to this style, which i personally think makes this image more unique and more visually appealing.
DEMONSTRATING THE USE OF WHITE BALANCE
Define white balance: white balance is determined by way of colour temperature which in itself is a way of measuring the quality and intensity of a light source. This is based on the ratio of blue and red light hitting the sensor, with the green light being ignored.

This image is using auto lighting.

This image uses day light lighting.

This image uses cloudy lighting.

This image uses Tungsten lighting.

This image uses fluorescent lighting.
All five of these images have been changed to different lighting on the camera setting to show the use of white balance and the different colours that get used. As you can tell I have also used macro on these images as i love the effect of what macro can do, as it enhances the image overall and the quality of how it appears. I personally love these photographs as along with the macro effect all the different colours used make each of the photographs individually interesting to look at.
Demonstrate the use of photoshop for cropping,
enhancing and changing the colour of your shots


This is the image after being edited.
EVALUATION
Over the past few weeks I have been taking various shots, helping me to explain different ways of taking photos as well as capturing certain aspects such as 'macro' or 'white balance'. I have learnt new techniques such as how to adjust camera settings, change colouring and other aspects through PhotoShop and learning what 'the rule of thirds' means.
After taking photo's of what I wanted to demonstrate, I then annotated each individual photograph explaining what I liked about it, and how I changed it to make it look different and 'unique'. I enjoyed this assignment as I was able to take photographs of what I wanted, not having a certain 'theme' to follow such as nature.
My favourite photographs I took was the christmas decorations, which demonstrated the use of macro shots, I think I liked this photograph best as I feel it demonstrated exactly what a macro shot is, as well as being extremely clear and 'fun' to look at, I also liked the colours as the edit I had done looked great, giving the photograph a 'calm' look.
From this assignment I learnt a lot of new techniques which will help me out in further assignments, and hopefully help me to improve future work.
I also like my portrait photography as unlike the other photo's it has a more proffessional appearance, because it was captured with photography equipment used only for portrait photography. I liked the original lighting used, however, I decided to slightly edit the image to show I was capable of changing colours using PhotoShop.


